Slow Computer… Clean It Up

Is your computer running slow? Does it take FOREVER to do the most simple of tasks? Do you still have every photo you ever took of your now 10 year old child on your lap top? Then this post is for you. I’m going to take you through, step by step, what you need to do to clear out your files (done with peace of mind) so that you do not have to invest in a new Mac Book Pro. There are many details to this post, so please read it through first – it may save you lots of time if you do.
Let’s talk storage – the hard drive on your computer can only hold so much and if your computer is running slow, the storage is most likely bogged down with photos & videos, old files & programs, and adware (those sneaky little things…). It’s a best practice to backup your computer regularly, but if you haven’t in a while or never have, it is all of those files that are slowing your machine down.
You’ll want to get additional storage for your computer in the form of cloud storage and an external hard drive. Because I, probably like you, are a bit skeptical about “the cloud” at times, I do a double back-up. I save to Dropbox, my cloud storage, then save to an external hard drive.
Here’s how I do it:
1. Buy external hard drive: I’m a Mac person and over the years have had good experiences with the G Technology series. Currently I use the g-drive 1 TB (because I’ve had it for a few years) but now they sell up to 4TB. You don’t need to go with that much memory unless you’ve got a lot of long form video.
2. Register for a cloud account with Dropbox (my affiliate link) – there are others to choose, but I like how Dropbox integrates with my iPhone and camera and allows me to store all of my hard drive contents (not just photos).
3. Plug in the power and connection cords to your external hard drive and turn on.
4. On your desktop, a little G-Drive icon will appear. Click on it and it shows you all the files & folders stored on the drive. Yours will be empty, tabula rasa, ready to fill.

5. To back up everything from your computer: On Mac choose from the menu bar ‘Go’ – ‘Home’ – in home all the folders that contain your files show up (Documents, Desktop, Downloads, Photos, Applications, etc).
6. Create a new folder on your external hard drive with the date and simply drag and drop each folder from your computer into the new folder on your external hard drive. This will take some time if you have a lot of items. You can walk away as the transfer is happening, prep dinner, come back and check then proceed.
There is a ‘Home’ folder on your PC that you can essentially do the same.
There are also programs and storage, like Time Machine with Time Capsule, you can get that do this for you regularly. I’m old school and do this manually. I also use this time to pick and choose what I need to keep and purge. I just make sure I’m backing up regularly.
7. When all is transferred over, click on your new folders to make sure the items are there (this is just a nervous precaution, but do it) if all seems right with the transfer, click on the G-Drive icon on your desktop and pull it to your Trash to close the hard drive down properly, then shut the power off.
Ok, we’re halfway done. Totally doable right?
Now we’re onto our cloud back up. I love that in Dropbox you can create folders and their hierarchy to what makes sense to you.
8. So before starting fill your Dropbox with new folders so your files will have a place to live. Name these folders so you can access things going forward. Need to find a photo of your little one for a school project? It will be a snap if you create photo folders by year – your camera names folders by date so finding Halloween 2010 is easy if you have a ‘Photos 2010’ folder then scan through to October. This is going to take some time, but once you do it, you will be Happy! and you’ll have a system going forward.
9. Then start dragging and dropping files into folders on Dropbox to save. Click one file, hold the return button and click on the bottom file to select a group, then drag the 20 files over. Again, do this and let it run. These uploads are going to 45 min each probably. Don’t only focus on your photo files, back up your personal and business folders to Dropbox as well.
***Note – there is also an iPhoto Importer that copies and sorts to Dropbox your whole iPhoto set up. This is great, but features have been depreciated with the on-set of Yosemite. If you are running an earlier operating system, then hop on down to #2 in System Going Forward below and see how you can back up your iPhoto to Dropbox with one click. See, it pays to read all the directions first!
10. Now you’ve got 2 sets of all your files – one on external hard drive and one on Dropbox – you can start erasing items from your computer. There is no way around the queasy, uneasy feeling you will have as you begin this process. All I can say is to check and double check your new folders to ensure that everything has been saved properly then get to it!
Erase all the photos and videos from your iPhoto – exhale! Then start to remove all the old documents from your “My Documents” and Desktop – old proposals? Nix! Multiple versions of your resume, but you now own your own business? Nix! Go all Marie Kondo on that stuff, you have back ups if you need to ever see those things again.
It feels weird and kinda empty now, so exhale again and know this is the path to quicker work flow.
11. We’re going to run some programs that will clean things up. I’ve got a few that I know to work well: Clean My Mac – download and follow the prompts to run. It safely cleans up files, photos, mail and your whole system and whats behind the scenes. The Clean My Mac page goes into detail about what it handles – worth it.
The second program is called Adware Medic – Malwarebytes
This clears out all of the stuff that is surreptitiously planted on your computer when you download something, shop, etc. Adware serves you advertisements and follows you while you browse to serve you specific advertising. I ran this for someone who had a pretty new laptop and found thousands of files to be deleted.
If you are on a PC, you can run Norton Utilites to clean out and speed up.
That’s it for clean up. Things should be humming along much better now.
Now you need a System Going Forward for your photos. Since you’ve already got them sorted adding to those folders with the new ones from your phone or camera is a breeze.
1. Connect your device to your computer. iPhoto will open automatically. Visually choose the starting point of your photos to download. Have you previously saved Jan & Feb? Just choose Mar & April to add. Download to iPhoto then do a manual back up to your external hard drive of these images. Certainly won’t take as long as the initial set up did.
2. When you sign up for Dropbox you should download & install the desktop app. This allows you do to many things with Dropbox right from you desktop.
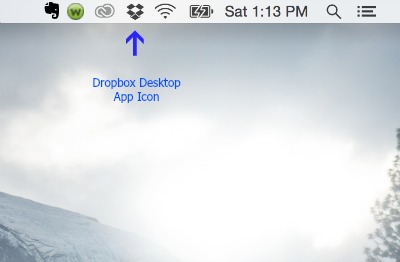
Click on the Dropbox icon in your menu bar, then click on the ‘Gear’ dropdown on the bottom right. Choose ‘Preferences’ then click on the ‘Import’ icon. here is where you can enable/disable photo upload and import photos direct from iPhoto
As I said above, this import feature has been disabled with the latest Mac OS version, Yosemite.

Check the box to enable camera uploads – choose from dropdown for Photo & Video.
Now when you attach your phone or camera to your computer, Dropbox will automatically open and give you the option to download your photos to a file. It downloads to a folder called “Camera Uploads”, but you can easily move items in bulk to properly named/dated folders.
And the more frequent you do these phone and photo downloads the quicker they go.
Oh and when you are done with these phone and camera downloads, you can delete from your devices and have all that glorious space to fill back up.
Whew, a doozy of a tutorial, but I think I hit all the points and threw in visuals for those odd little bits. Ask me any questions in the comments and I’ll get right back to you.
Enjoy your speed and space.